🧰 Tools & Gear You’ll Need
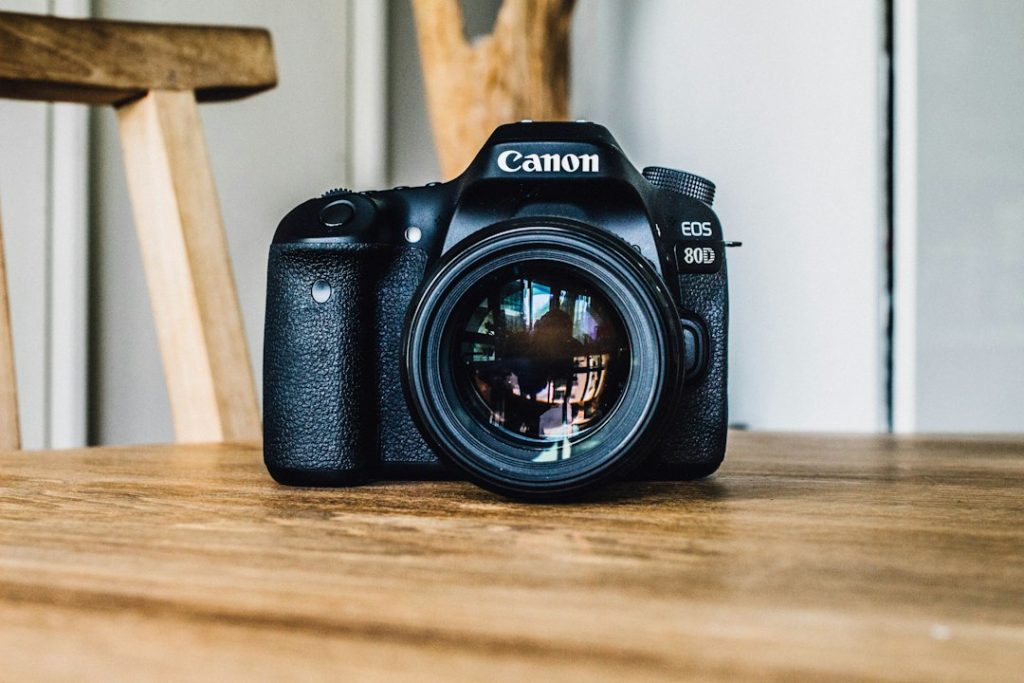
- Mirrorless DSLR camera with clean HDMI output
- HDMI capture card (USB or internal)
- USB-C or HDMI cable (depending on camera and capture card)
- NP-FW50, LP-E6, or equivalent dummy battery and AC adapter (or a spare battery with a charger for hot-swapping)
- Ball head mount or flexible arm clamp
- Tripod or camera stand
- USB-C hub or available USB-A ports
- Dedicated lighting (key light, fill light, backlight – e.g., LED panels, ring light)
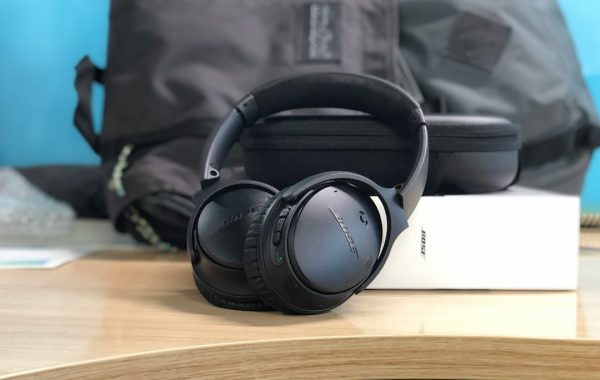
- External microphone (XLR or USB)
- Optional: Software like OBS Studio or Streamlabs Desktop
Why Your Built-in Webcam Fails: The Mirrorless DSLR Advantage
Let’s cut to the chase: your laptop’s built-in webcam is likely a relic. Designed for basic video conferencing years ago, it struggles with modern demands for clarity, professionalism, and aesthetic appeal. Think blurry images, poor low-light performance, and a general lack of polish that can undermine your credibility before you even speak. This is where your mirrorless DSLR, a tool you likely already own for photography, steps in to revolutionize your virtual presence.
Beyond Pixels: Superior Image Quality for Professional Presence
The difference in image quality between a typical webcam and a mirrorless DSLR is night and day. DSLRs and mirrorless cameras boast significantly larger sensors, which are the core component responsible for capturing light. This larger sensor allows for better light gathering, resulting in sharper images, richer colors, and far superior performance in less-than-ideal lighting conditions. You’ll notice a dramatic reduction in noise and grain, especially when you’re not in a perfectly lit studio. This translates to a more professional, engaging on-screen appearance, conveying competence and attention to detail. Your clients and colleagues will notice the difference instantly – you’ll look less like you’re broadcasting from your home office and more like you’re presenting from a professional studio.

Real-Time Control: Leveraging DSLR Features for Dynamic Video
Webcams offer minimal, if any, control over image parameters. Your DSLR, however, is a powerhouse of creative control. You can manually adjust aperture to achieve a shallow depth of field, blurring the background and making you the undisputed focal point – a look impossible with most webcams. You can fine-tune shutter speed and ISO for optimal brightness and motion blur, and critically, you can select specific picture profiles or color settings to match your brand or desired aesthetic. This level of control allows you to craft a unique visual identity for your video calls, setting you apart from the sea of generic webcam feeds. Imagine adjusting your camera to perfectly match the lighting in your office or to create a specific mood for a client presentation; that’s the power you unlock.
The Cost-Benefit Analysis: DSLR vs. Dedicated Webcam Upgrade
High-end webcams can easily set you back $100-$300, and even then, they often can’t match the raw image quality and control offered by a DSLR. If you already own a compatible mirrorless DSLR, the marginal cost of setting it up as a webcam is significantly lower. The primary investments are a capture card ($50-$150 for a decent USB model) and potentially a dummy battery or AC adapter ($30-$80) to ensure continuous power. When you factor in the vastly superior image quality, professional look, and creative control, using your existing DSLR is often the most cost-effective route to a professional video setup. It’s not just about pixels; it’s about the overall presentation and perceived value you bring to every interaction.
Essential Gear Checklist: What You Need for the Perfect DSLR Webcam Setup
Getting your DSLR camera ready for webcam duty involves a few key pieces of hardware. Don’t skimp here; the right gear makes all the difference in achieving a stable, high-quality stream.
Choosing the Right Mirrorless DSLR for Webcam Duty
Not all mirrorless cameras are created equal for this task. The absolute non-negotiable feature is a clean HDMI output. This means the camera outputs a video signal via HDMI without any on-screen display overlays (like battery percentage, shooting mode, or focus points). Many DSLRs and mirrorless cameras from the last 5-7 years offer this. Check your camera’s manual or online reviews specifically for “clean HDMI output” or “HDMI as webcam” capabilities. Brands like Sony (a6000 series, a7 series), Canon (EOS M series, EOS R series), Fujifilm (X-T series, X-S series), and Panasonic (Lumix G and GH series) all have models that excel here. Newer models often have USB streaming capabilities, but HDMI offers more universal compatibility and control.
Capture Cards: Bridging the Gap Between Camera and Computer
Your DSLR outputs an HDMI signal, but your computer’s USB port doesn’t inherently understand video signals directly from a camera. This is where a capture card comes in. It acts as an intermediary, converting the HDMI video signal from your camera into a format your computer can recognize as a webcam source, typically via USB. For most users, a USB 3.0 capture card is sufficient. Brands like Elgato, AverMedia, and Cam Link are reputable choices. Cheaper, unbranded cards are available, but they often suffer from higher latency, less reliable performance, and poorer color reproduction. For a truly pro setup, consider an internal PCIe capture card if your desktop has available slots, as they can offer lower latency and higher bandwidth.

Power Solutions: Keeping Your Camera Live All Day
Running a camera via HDMI output, especially continuously, drains its battery very quickly – often within an hour or two. Relying on standard camera batteries means you’ll be constantly swapping them out, which is impractical and can lead to dropped calls. The best solution is a dummy battery (also known as an AC adapter kit or power coupler). This small device replaces your camera’s battery and plugs into a wall outlet via an AC adapter, providing continuous, uninterrupted power. Ensure you purchase the correct dummy battery model for your specific camera battery type (e.g., NP-FW50 for many Sony models, LP-E6 for many Canon models). If a dummy battery isn’t available for your camera, have multiple fully charged spare batteries ready for quick swaps.
Mounting & Positioning: Achieving the Ideal Angle
Forget the awkward top-down view from your laptop screen. To achieve a flattering, professional angle, you need a way to position your DSLR correctly. A small tripod placed behind your monitor, a flexible gooseneck arm clamp attached to your desk, or a dedicated monitor mount are excellent options. Aim for the camera to be positioned at eye level, looking slightly down at you, mimicking a natural human conversation. This angle is far more engaging than a chin-and-ceiling shot. Experiment with different heights and distances to find what works Best for your background and lighting.
Audio Upgrade: Don’t Let Your Mic Ruin the View
While this guide focuses on video, remember that poor audio can instantly sabotage even the most visually stunning presentation. Your camera’s built-in microphone is almost certainly inadequate. Invest in an external microphone. For remote work and Zoom calls, a good USB microphone (like a Blue Yeti or Rode NT-USB+) offers excellent quality and simplicity. If you have an XLR microphone setup, you’ll need an audio interface to connect it to your computer. Ensure your microphone is positioned correctly – typically closer to your mouth than your camera – and that it’s selected as the primary audio input in both your camera’s settings (if it has mic input and can record audio alongside video) and your Zoom client.
Step-by-Step: Connecting Your Mirrorless DSLR to Zoom
Now that you have the gear, let’s get it all connected and configured.
Camera Settings for Optimal Webcam Performance
This is crucial. You need to configure your camera to prioritize video output and image quality.
Set Camera to Video Mode
Switch your camera to its video recording mode. This often unlocks different settings and optimizes the sensor for video capture.
Enable Clean HDMI Output
Navigate your camera’s menu and find the setting for HDMI output. Ensure you select the option for “Clean HDMI,” “HDMI Out (No)\,” or similar, disabling all overlays.
Select Video Resolution & Frame Rate
For Zoom, 1080p (1920×1080) at 30 frames per second (fps) is generally ideal. Higher resolutions can strain your computer and internet connection. Some cameras offer 4K output, but check if your capture card supports it and if your computer can handle the bandwidth.
Manual Focus
Set your lens to manual focus and choose a focal length that keeps you sharp. Autofocus can sometimes hunt or jump unexpectedly during a call, which is distracting. If your camera has focus peaking, enable it to help you nail the focus.
Picture Profile/Color Settings
Choose a neutral picture profile or set your color, saturation, and contrast to relatively flat settings. This provides more flexibility in post-processing or in real-time via software. Avoid overly saturated or contrasty in-camera profiles unless you’re absolutely sure that’s your desired look and you’re not using any further color correction.
Disable Image Stabilization (If Applicable)
In-camera image stabilization can sometimes introduce slight jitters when the camera is mounted on a stable tripod. If you notice any subtle movements, try disabling this feature in your camera’s menu.
Configuring Your Capture Card for Seamless Integration
Connect your camera’s HDMI output to the capture card’s HDMI input using your HDMI cable. Then, connect the capture card to your computer, usually via USB. Your computer should recognize the capture card as a video input device. If it requires specific drivers, install them now.
Connect HDMI Cable
Run the HDMI cable from your camera’s HDMI OUT port to the capture card’s HDMI IN port. Ensure connections are secure.
Connect Capture Card to Computer
Plug the capture card into a USB 3.0 (or higher) port on your computer. If using a USB hub, ensure it’s a powered hub and offers sufficient bandwidth.
Verify Recognition
Open your system’s camera settings or a simple video viewing application (like Windows Camera app or QuickTime Player on Mac) to confirm the capture card is recognized as a video source. You should see your camera’s feed.
Zoom Client Setup: Selecting Your Camera and Audio Sources
With the hardware connected and recognized, it’s time to tell Zoom to use them.
Open Zoom Settings
Launch the Zoom desktop client and navigate to Settings (usually accessible via the gear icon).
Select Video Source
Go to the ‘Video’ tab. In the camera dropdown menu, select your capture card (it will likely appear with its brand name or as a generic “USB Video Device”). You should now see your DSLR’s video feed in the preview window.
Select Audio Source
Go to the ‘Audio’ tab. In the microphone dropdown menu, select your external microphone. If you’re not using an external mic, select your computer’s built-in microphone or your capture card if it also passes through audio (less common).
Adjust Video Settings (Optional)
In Zoom’s video settings, you might find options for HD video. Ensure this is enabled for the best quality. You can also find options to ‘Touch up my appearance’ or ‘Adjust for low light,’ but these can sometimes degrade image quality, so use them sparingly or disable them if your lighting and camera are good.
Lighting Fundamentals: Professional Illumination Techniques
Even the best camera struggles in bad light. Good lighting is non-negotiable for a professional look.
The Three-Point Lighting Setup (Simplified)
At its core, professional lighting involves a key light, a fill light, and often a backlight. For webcam use, focus on the key light primarily.
Key Light: The Main Light Source
This is your primary light. Position it about 45 degrees to one side of your camera, slightly above eye level. This creates definition and shape. Use a soft light source – a large LED panel with a diffuser, or a ring light – to avoid harsh shadows.
Fill Light: Softening Shadows
If the shadows from your key light are too harsh, use a fill light on the opposite side of the camera, at a lower intensity. Its job is to subtly lift the shadows, not to create a second main light.
Backlight (Optional): Adding Depth
A backlight placed behind you and slightly to the side can help separate you from the background, adding depth. Use it sparingly to avoid blowing out highlights.
Avoid Direct Overhead or Back Lighting
Ceiling lights often create unflattering shadows under your eyes and nose. A light source directly behind you will silhouette you. Natural light from a window can work, but it’s less controllable than dedicated lights.

Advanced Techniques for a Polished Pro Look
Once you’ve mastered the basics, you can elevate your appearance further.
Mastering Depth of Field: The Blurred Background Advantage
A shallow depth of field (DoF) blurs the background, making you stand out. Achieve this by using a wide aperture (low f-number, e.g., f/1.8, f/2.8) on your lens and positioning yourself further away from the background. Ensure your camera is set to manual focus to maintain sharpness on your face. This professional look is a hallmark of studio productions and is largely unattainable with standard webcams.
Smooth Zooms & Focus Pulls: Dynamic Camera Movement
While you won’t be physically zooming your camera during a call (unless you have a dedicated PTZ camera), you can simulate zooms and focus pulls using software like OBS Studio. You can also practice smooth manual focus adjustments if you need to shift focus between yourself and a document or object. This requires practice and a steady hand, but it adds a dynamic, engaging element to your presentation that webcams can’t replicate.
Integrating Multiple Cameras for Enhanced Presentations
For more complex presentations or training sessions, consider using multiple cameras. You could have a wide shot and a close-up shot, or a camera focused on a whiteboard. This requires multiple capture cards and more powerful hardware to manage, but it allows for professional-level production switching between different angles on the fly.
Using Software for Advanced Control & Effects
Software like OBS Studio, Streamlabs Desktop, or XSplit Broadcaster can act as a virtual camera driver, taking your capture card feed and allowing you to add overlays, graphics, text, and transitions before sending it to Zoom. This gives you an immense amount of control over your on-screen presentation, allowing for branded elements, lower thirds, and more sophisticated visual effects.
Troubleshooting Common DSLR Webcam Issues
Even with the best setup, you might encounter hiccups. Here’s how to address them.
Video Lag and Dropped Frames: Finding the Bottleneck
Lag or dropped frames usually point to a bandwidth issue. Ensure your capture card is connected via USB 3.0 or higher. Close unnecessary applications running on your computer. Check your internet connection – a stable, fast connection is vital. If using Wi-Fi, consider switching to a wired Ethernet connection. Sometimes, the camera’s HDMI output resolution might be too high for your capture card or computer’s processing power; try lowering it to 1080p.
Audio Sync Problems: Keeping Sound and Vision Aligned
If your audio is out of sync with your video, it’s often due to varying processing delays between your camera feed and your audio feed. Zoom has an “Adjust for video call lighting” feature that can sometimes help, but dedicated audio/video sync tools within streaming software (like OBS) are more robust. If you’re using a capture card that doesn’t pass audio, ensure your external microphone is selected as the primary audio device in Zoom. If you’re using a camera with a mic input and recording audio internally, ensure that audio is properly routed and synced in your editing software if you ever plan to re-record.
Camera Overheating: Sustaining Long Broadcasts
Some cameras, especially when used for extended periods in video mode, can overheat. Using a dummy battery/AC adapter kit is often better for heat management than running on a standard battery. Ensure your camera has adequate ventilation; don’t stack other equipment directly on top of it. If overheating persists, you might need to periodically turn the camera off for a few minutes or consider a camera model known for better thermal performance during video recording.
Software Conflicts: Ensuring Compatibility
Occasionally, different video or audio drivers can conflict. Ensure your camera, capture card, and microphone drivers are all up to date. If you’re using OBS or similar software, ensure it’s configured correctly to output to Zoom’s virtual camera or directly stream to Zoom if that option is available. Test your setup thoroughly before an important meeting.

Elevate Your Remote Work: Beyond Basic Zoom Calls
The setup you’ve built isn’t just for Zoom meetings; it’s a versatile broadcasting tool.
Livestreaming with Your DSLR Setup
Using software like OBS Studio, you can easily transition your DSLR webcam setup into a professional livestreaming rig for platforms like YouTube, Twitch, or Facebook Live. Your superior image quality and control will make your streams stand out.
Recording High-Quality Content for Training and Marketing
Need to create training videos, product demos, or marketing content? Your DSLR setup is perfect for recording high-quality video directly to your computer, saving you the step of transferring footage from memory cards and often eliminating the need for additional recording equipment.
Virtual Event Production with Your DSLR Rig
For larger virtual events, conferences, or webinars, your DSLR setup can be the backbone of a professional production. With multiple cameras, graphics, and skilled operation (even if that’s just you), you can create polished, engaging virtual experiences that rival in-person events.
FAQ: Your Top Mirrorless DSLR Webcam Questions Answered (2026)
Q1: Do I really need a capture card? Can’t I just use a USB connection?
A1: Some newer cameras offer direct USB webcam functionality, which simplifies the setup. However, for many cameras, especially those with cleaner HDMI output, a capture card is essential. It provides broader compatibility and often better performance than generic USB streaming solutions. Always check your camera’s specifications.
Q2: Will my camera’s autofocus work well for Zoom?
A2: Camera autofocus systems can be unpredictable in a webcam scenario. They might hunt for focus, rack focus unexpectedly, or not lock onto your face correctly. Manual focus, or carefully setting autofocus to a specific area and keeping it there, is generally more reliable for static webcam use.
Q3: Can I use my camera’s screen as a preview while it’s connected as a webcam?
A3: In most cases, when using clean HDMI output, the camera’s LCD screen will turn off or display a limited interface. This is normal, as the camera is prioritizing the clean video signal output. Rely on your computer’s Zoom preview window to see what your audience sees.
Q4: What’s the difference between a $50 capture card and a $150 one?
A4: Higher-priced capture cards typically offer better build quality, more reliable chipsets, lower latency (less delay between what happens and what you see/hear), better color accuracy, and support for higher resolutions or frame rates. For critical professional use, investing in a reputable brand is often worth it to avoid frustrating issues.
Q5: Is it bad for my camera to run it continuously for hours?
A5: Running any electronic device for extended periods can increase heat and wear. However, modern mirrorless cameras are generally designed to handle continuous video recording, especially when powered by an AC adapter. Overheating is the primary concern, as mentioned in troubleshooting. Following best practices and ensuring good ventilation should mitigate most risks.