🧰 Tools & Gear You’ll Need
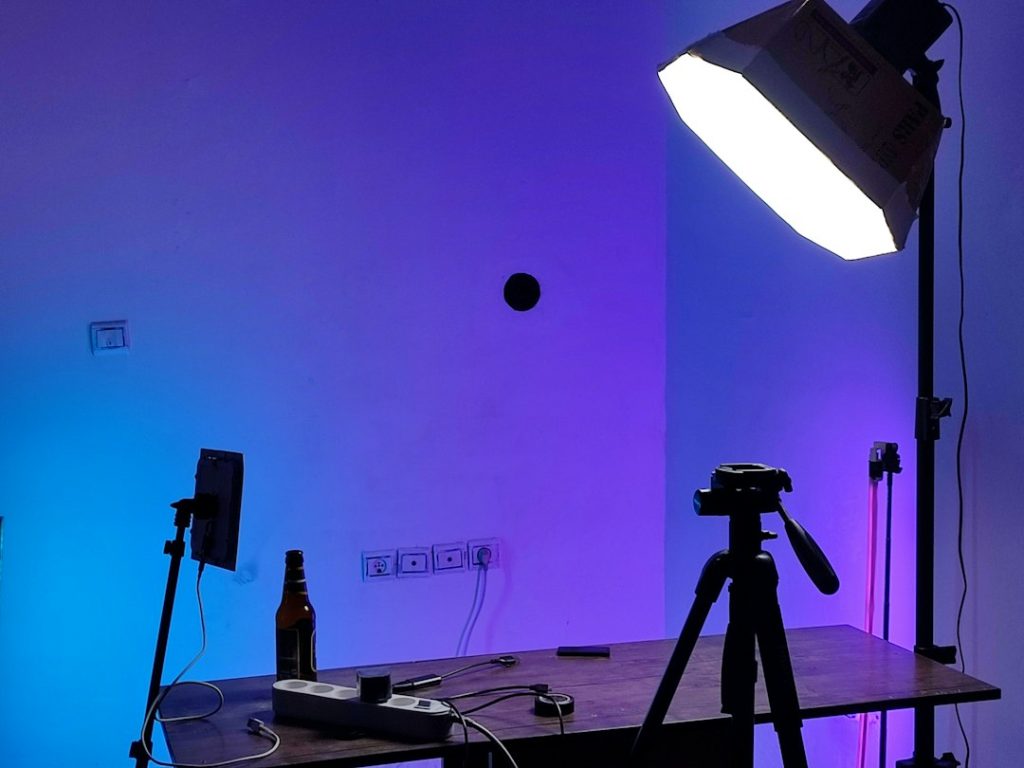
- One large softbox with a continuous LED light source (for Key Light)
- One smaller softbox or strip light with a continuous LED source (for Rim Light/Hair Light)
- Adjustable light stands for both softboxes
- Optional: Light meter or smartphone app for light measurement
- Optional: Black backdrop or clean wall
- Optional: Small reflector or white card (for fill light, if needed)
The Essential Softbox Lighting Duo: Key Light & Rim Light Explained
Getting your video call lighting right often feels like a dark art, but it doesn’t have to be. Forget fumbling with laptop webcams or relying on harsh overhead room lights that cast unflattering shadows. For 2026, a professional video call setup hinges on deliberate lighting. The bedrock of this professional look is a simple yet powerful two-light system: the key light and the rim light. Mastering these two elements transforms your appearance from amateur to authoritative, ensuring you’re seen clearly and professionally on any platform.
Understanding the Role of the Key Light
The key light is your primary light source. Its main job is to illuminate your face, defining your features and setting the overall mood of your shot. For video calls, this means it needs to be bright enough to make you clearly visible without causing harsh shadows or blowing out details. Positioned correctly, it sculpts your face, creating dimension and ensuring viewers can connect with you visually. The quality of the light is paramount; a softbox diffuses the light, wrapping it around your face for a soft, flattering, and professional look, unlike a bare bulb that would be jarring and unflattering.
The Impact of the Rim Light (Hair Light)
While the key light illuminates your face, the rim light, often called a hair light when positioned behind you, serves a crucial secondary purpose: separation. Its job is to create a subtle outline of light around your head and shoulders, separating you from the background. This is critical for making you pop out of the frame, giving your image depth and preventing you from looking like you’re a flat cutout pasted onto your background. A well-executed rim light adds a polished, three-dimensional quality to your presence, making you appear more present and professional.
Why Dedicated Lighting Beats Ambient Light for Video Calls
Relying on ambient room light (like a window or a ceiling fixture) is the most common mistake remote professionals make. Ambient light is unpredictable and uncontrollable. It changes throughout the day, is influenced by external factors, and rarely falls on you in an even, flattering way. Using dedicated softbox lights gives you complete control. You can dictate the direction, intensity, and quality of light, ensuring a consistent, professional look regardless of the time of day or your room’s natural lighting conditions. This control is what elevates a standard video call to a premium viewing experience.
Choosing the Right Softbox Lighting Gear for Your 2026 Video Setup
Selecting the right gear is more than just picking the cheapest option; it’s about understanding how different components work together to achieve your desired look. For professional video calls, softbox lighting is king due to its ability to produce soft, diffused light.
Softbox Types: Octabox vs. Standard Softbox for Video Calls
For most video call applications, a standard rectangular or square softbox is perfectly adequate. They offer a good balance of light quality and ease of use. Octaboxes, with their eight-sided shape, produce a slightly rounder catchlight in the eyes, which some find more aesthetically pleasing. However, for the specific purpose of illuminating a face on a video call, the difference is often negligible, and standard softboxes are typically more affordable and easier to find in compact kits. The key is diffusion; ensure your softbox has a good diffusion fabric.
LED vs. Tungsten Lighting: Power, Heat, and Color Accuracy
In 2026, LED lighting is the undisputed champion for video call setups. Unlike older tungsten (incandescent) lights, LEDs run significantly cooler, meaning you won’t feel like you’re in a sauna during long calls. They consume far less power and, crucially for video, offer excellent color accuracy. Look for LEDs with a Color Rendering Index (CRI) of 95 or higher, and a high TLCI (Television Lighting Consistency Index). This ensures that the colors in your video feed, especially skin tones, appear natural and true to life. Tungsten lights, while capable of producing soft light, generate excessive heat and have a color temperature that can make skin look sallow without compensation.
Recommended Lighting Kits for Remote Professionals (Under $200)
You don’t need to break the bank for a professional lighting setup. Several excellent and affordable LED softbox kits are available that provide everything you need to get started. These kits typically include two lights, stands, and softboxes.
Neewer LED Video Lighting Kit with Softbox
Neewer offers a range of budget-friendly lighting kits that punch above their weight. Their LED panels with softbox attachments are popular for remote workers. Look for kits that include adjustable brightness and color temperature (though for a consistent look, fixed color temperature around 5600K is often preferred for video). These kits are straightforward to set up and provide reliable illumination for video calls.
GVM LED Studio Lighting Kit with Softbox
GVM provides slightly more advanced, yet still accessible, LED lighting kits. Their units often feature higher CRI ratings and more robust build quality. Kits typically include softboxes and stands, making them a comprehensive solution. While often a bit pricier than Neewer, GVM kits can offer superior light quality and durability for the investment.

Step-by-Step Guide: Setting Up Your Softbox Key Light
The key light is the foundation of your lighting scheme. Proper placement and adjustment are critical for flattering illumination.
Position the Key Light
Place your key light softbox to one side of your camera, ideally at a 45-degree angle to your face. This is a classic technique that creates a natural-looking shadow on the opposite side of your face, adding dimension without being distracting. The light should be positioned slightly higher than your eye level.
Adjust Height and Angle
Fine-tune the height and angle of the key light so that it illuminates your face evenly. For most people, pointing the light slightly downwards towards your face works best. Experiment with the exact angle based on your facial structure. You want to avoid harsh shadows under your nose or chin.
Control Intensity and Diffusion
Most LED lights have dimmer controls. Start with the light at around 50-75% brightness and adjust based on how you look on camera. The goal is to be well-lit but not overexposed. Ensure the diffusion fabric is securely attached to the softbox. If the light still seems too harsh, you can sometimes move it slightly further away or add an additional layer of diffusion if your kit allows.
Integrating the Rim Light for Depth and Separation
Once your key light is set, the rim light adds that professional polish by creating separation from your background.
Positioning the Rim Light
Place your rim light softbox (or strip light) behind you and slightly off to one side, typically opposite your key light. The goal is for the light to catch the edge of your hair and the back of your shoulders, creating that subtle outline. Aim it towards the back of your head and shoulders.

Fine-Tuning Rim Light Brightness
The rim light should be noticeably dimmer than your key light. If it’s too bright, it will overpower the key light and look unnatural. Start with the rim light at its lowest setting and gradually increase it until you see a gentle separation. You don’t want a halo; you want a subtle edge light that defines your form.
Balancing Key and Rim Light Ratios
The interplay between your key and rim light determines the final look. A common starting ratio is roughly 2:1 or 3:1 (key light to rim light intensity). This means your key light is two to three times brighter than your rim light. Adjust both lights until you achieve a look where you are clearly illuminated, and your silhouette is subtly defined against the background.
Advanced Techniques: Elevating Your Video Call Background Lighting
Once you’ve mastered the two-light setup, you can explore techniques to further enhance your video presence.
Using a Three-Point Lighting Setup for Ultimate Control
A three-point lighting setup adds a third light, known as the fill light. Placed opposite the key light, the fill light softens any shadows created by the key light. For video calls, you often don’t need a powerful fill light; a low-powered light or even a reflector can suffice. Its purpose is to ensure that the shadow side of your face isn’t too dark, maintaining detail without flattening the image.

Creating a ‘V-Flat’ Effect with a Reflector
A simple yet effective way to control shadows without a dedicated fill light is by using a reflector. Position a white card, foam board, or a silver/white reflector opposite your key light. It bounces some of the key light back onto the shadow side of your face, subtly filling in shadows. This can be more natural-looking than a third light if you’re aiming for a minimal setup.
Managing Light Spill and Background Illumination
Light spill refers to light that falls where you don’t want it, particularly on your background. If your background is dark and undemanding, a little spill might be fine. However, if you want a clean, professional background, you’ll need to manage your lights. Use barn doors or flags (if your lights have them) to direct the light. Sometimes, positioning your lights closer to you and further from the background is necessary. You might also consider adding a small, separate light to subtly illuminate your background, ensuring it’s not a completely dark void unless that’s the intended effect.
Troubleshooting Common Video Call Lighting Issues
Even with the best setup, issues can arise. Here’s how to tackle common problems.
Eliminating Shadows and Glare on Your Face
Harsh shadows or excessive glare are usually caused by light sources that are too small, too close, or too direct. Ensure your softboxes are providing diffuse light. If you have glare (shiny spots), your key light might be too intense or positioned directly above and too close. Adjust the brightness, distance, and angle. Sometimes, slightly turning your face away from the light can help reduce glare.

Achieving Natural Skin Tones in 2026 Video Calls
Inaccurate color temperature is the main culprit behind unnatural skin tones. As mentioned, LEDs with high CRI and TLCI ratings are essential. If your lights have adjustable color temperature, set them to match your room’s ambient light (e.g., around 5600K for daylight-balanced LEDs) or use a consistent setting and white balance your camera accordingly. Avoid mixing drastically different color temperatures (e.g., warm tungsten with cool fluorescent) without correction.
Dealing with Mixed Lighting Environments (Daylight vs. Artificial)
This is a common challenge. If you have a window providing daylight on one side and your artificial lights on the other, you’ll get competing color temperatures. The best approach is to either:
1. Control the window light: Close blinds or curtains to block the window and rely solely on your controlled artificial lights.
2. Match your lights: If you can’t block the window, try to match your artificial lights’ color temperature to the window’s light (often daylight-balanced, around 5000-5600K). Use your key light to dominate the illumination.
3. Use software white balance: As a last resort, use your software’s white balance feature to find a compromise, but this can sometimes lead to less natural results.